Skip to main contentWhatsApp Agents Quickstart
Build your first WhatsApp agent and start messaging your customers through WhatsApp 🚀
You will:
- Set up your WhatsApp Business credentials
- Connect your WhatsApp number to Pranthora
- Configure your webhook
- Add intelligence to power your agent
🧩 Prerequisites
- A Meta developer account
- Access to Meta for Developers
- A WhatsApp Business number (test number works fine)
💡 Tip: If you’re brand new to the WhatsApp Cloud API, keep the Meta docs open in a separate tab for quick reference.
1. Get Your WhatsApp Credentials
To get started, you need these three values from Meta:
- Phone Number ID
- Access Token
- WhatsApp Business Account ID
If you haven’t set up WhatsApp Business yet, follow Meta’s setup to create an app and obtain these credentials.
📚 Reference: Official WhatsApp Cloud API – Get Started
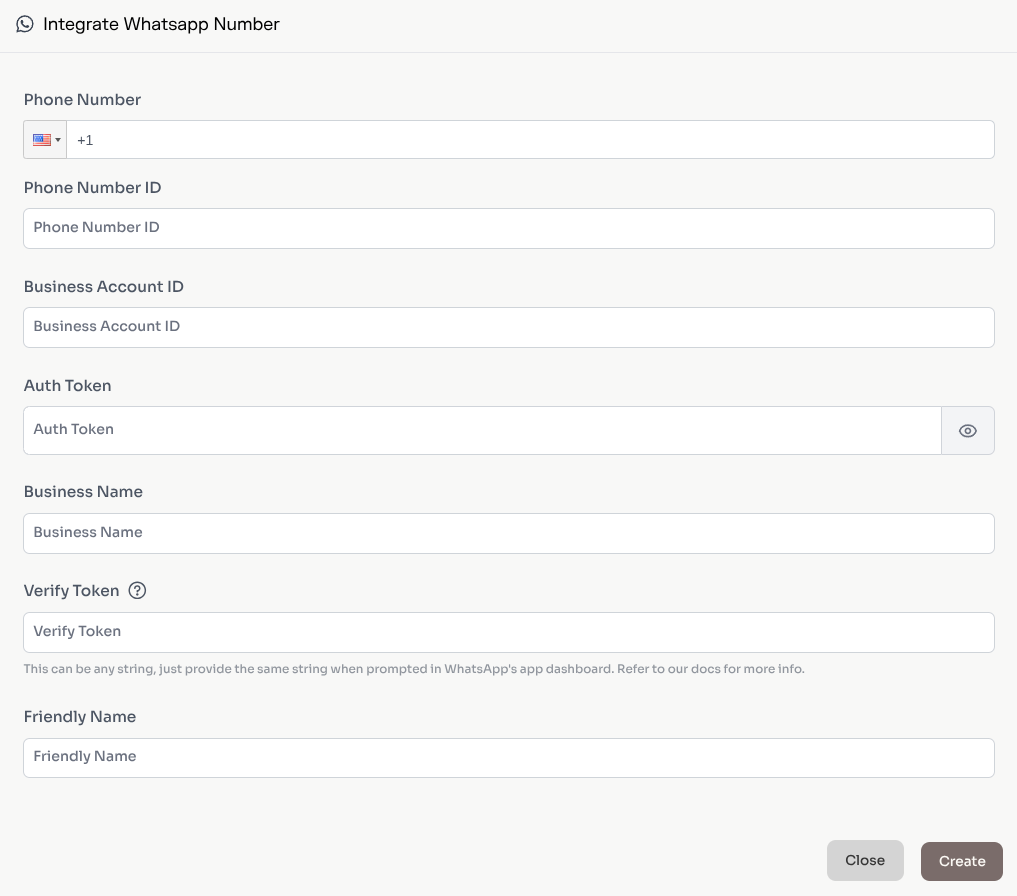
2. Integrate Your WhatsApp Number with Pranthora
Follow these steps to connect your number:
-
Log in to Pranthora
-
Open WhatsApp in the sidebar
- Click on WhatsApp in the left navigation
-
Start the integration
- Click Integrate WhatsApp Number
-
Fill in the integration form
-
Use your credentials from Meta
-
Quick reference of fields:
- Phone Number: Your WhatsApp Business phone (pick correct country code)
- Phone Number ID: From Meta
- Business Account ID: From Meta
- Auth Token: Access token from https://developers.facebook.com/apps
- Label: A friendly name (e.g., “Customer Support Bot”)
- Business Name: Your business name
- Verify Token: Any string; you will reuse it in the webhook step
-
Create the integration
🔐 Security tip: Store your access token securely. Rotate it regularly and avoid sharing it in screenshots.
-
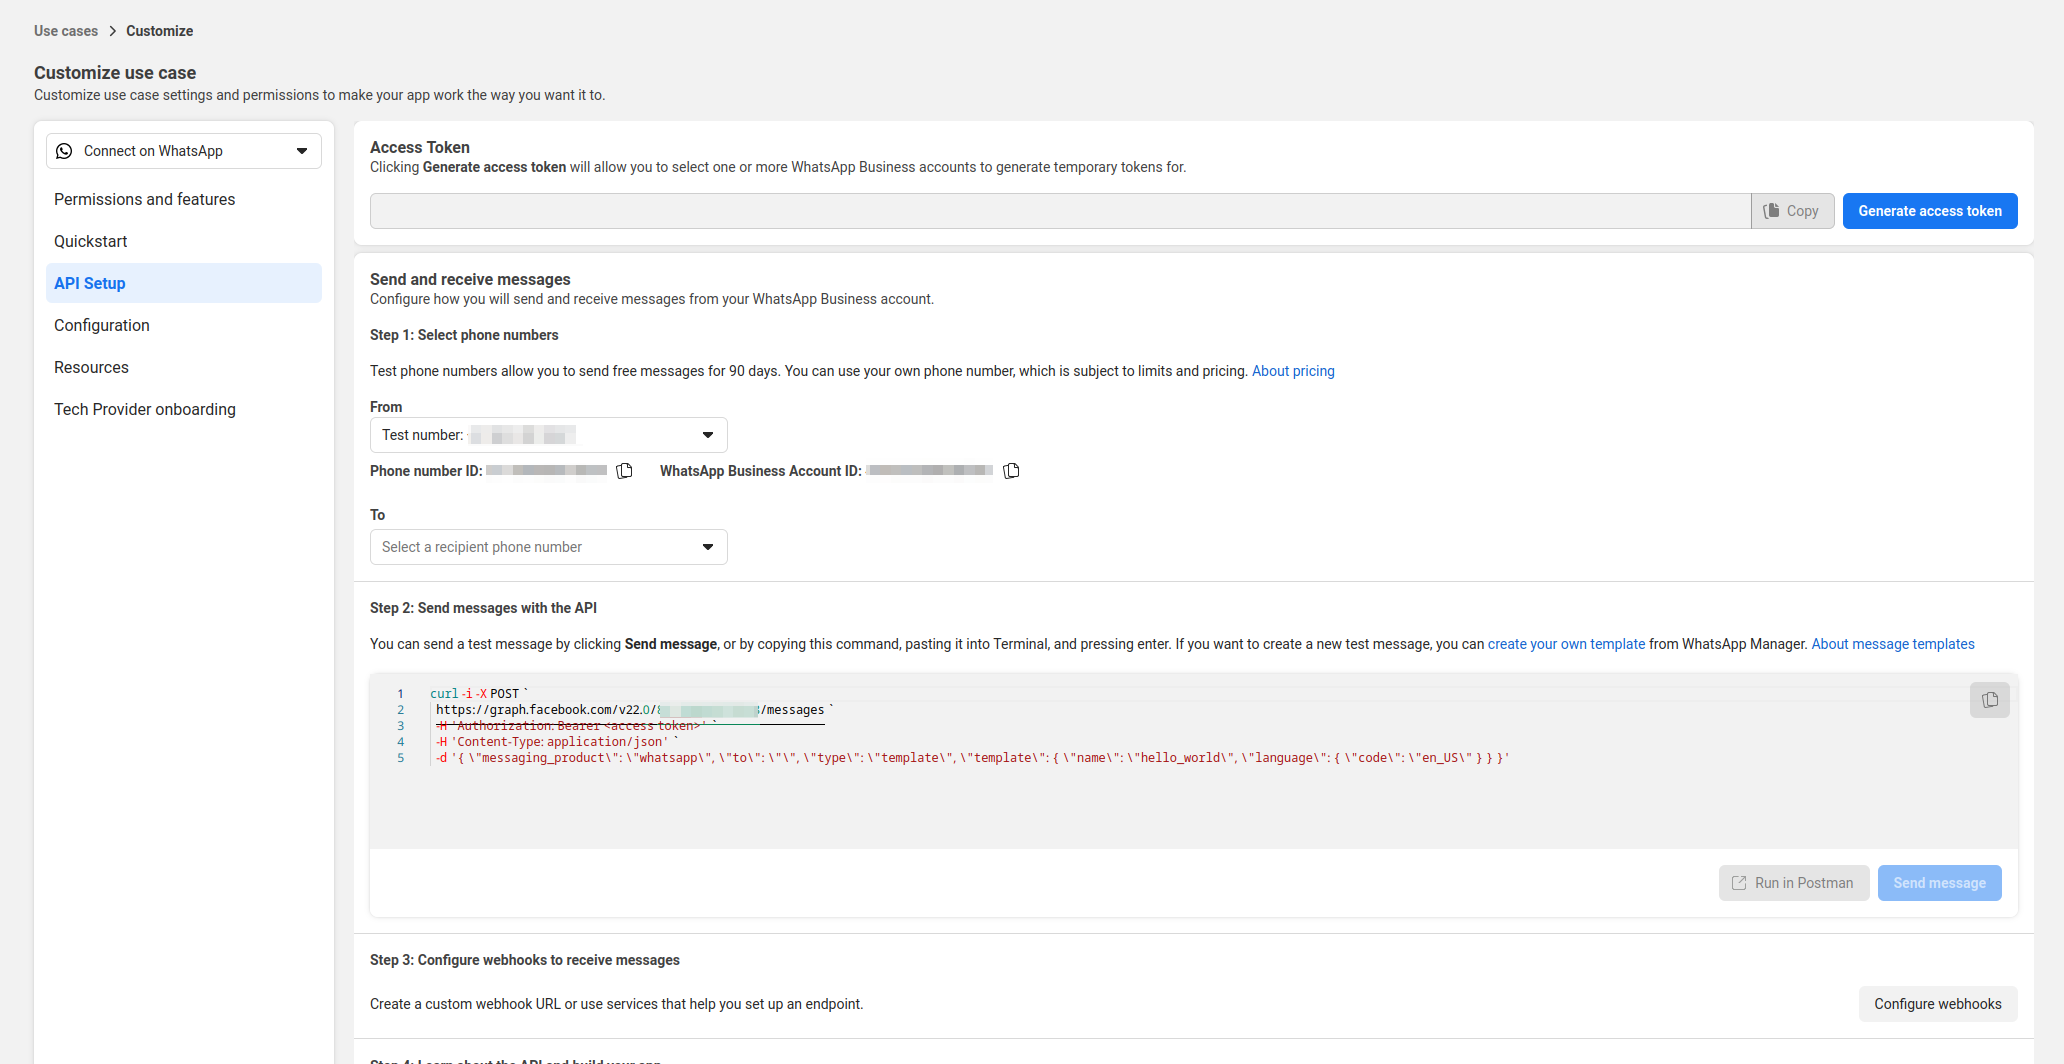
Go to https://developers.facebook.com/apps and select your app
-
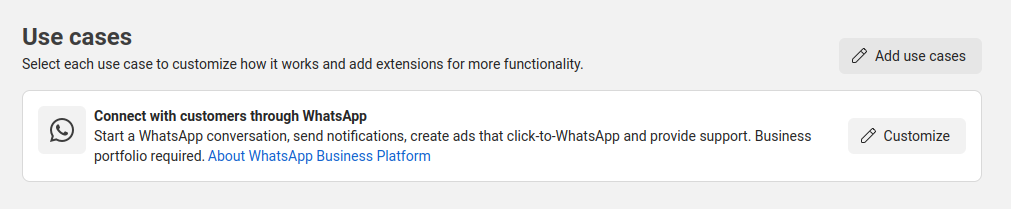
In the left sidebar, open Use cases → click Customize for the WhatsApp use case
-
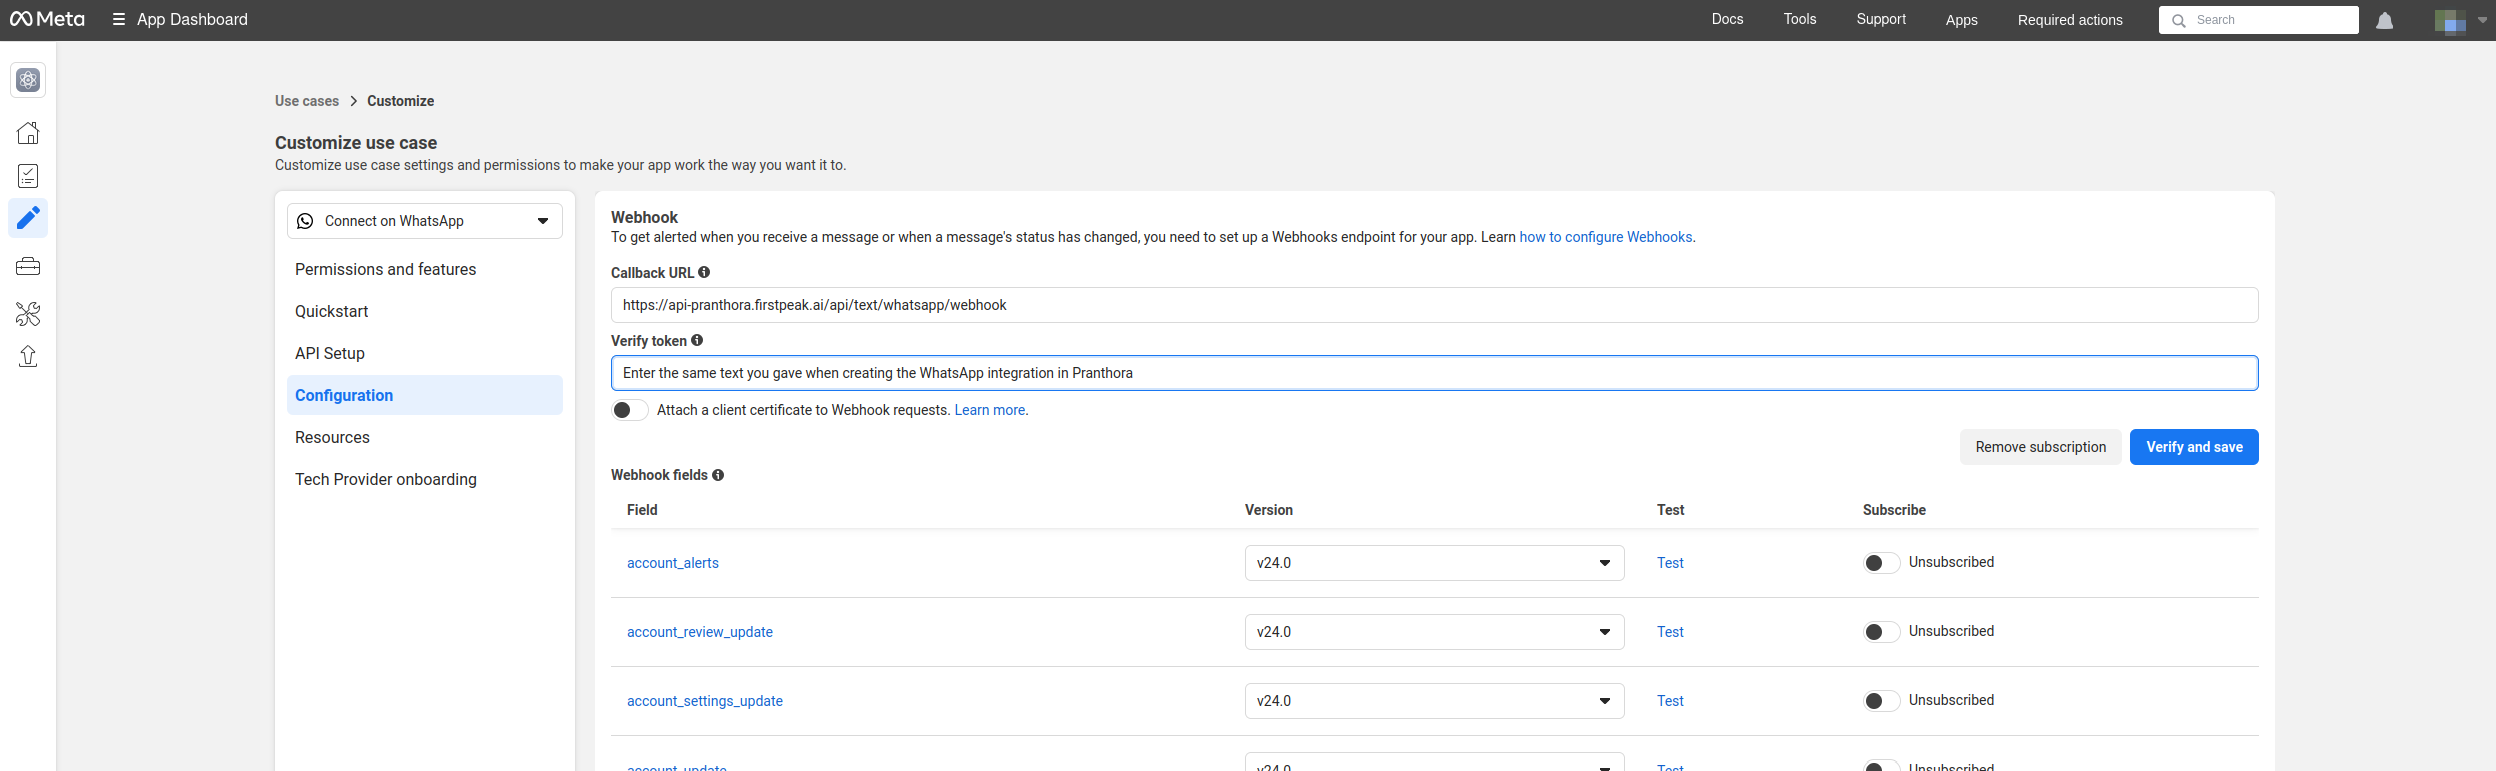
Under Configuration, open Webhook Configuration
-
Set the following values:
-
Click Verify and Save
-
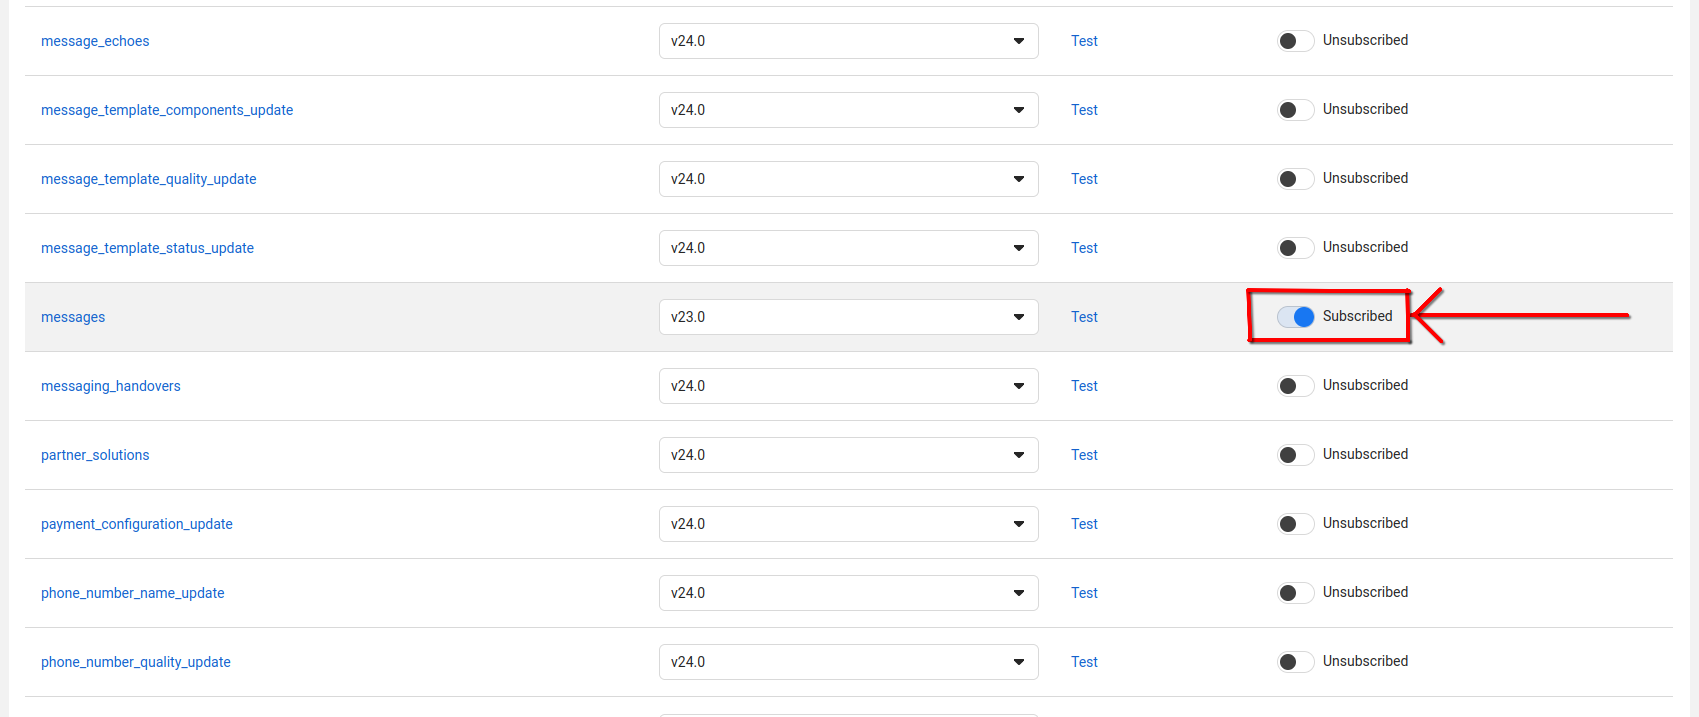
Enable the
messages field in Webhook fields
⚠️ Important: This is required for your agent to receive messages.
-
Confirm that webhook status updates inside Pranthora
✅ You’re all set!
Your WhatsApp agent is now integrated and ready to use. Send a message to your connected number to test end-to-end.
🧪 Tip: If a message doesn’t arrive, re-check the webhook verify token, ensure the messages field is toggled, and confirm that your access token hasn’t expired.